
You’ll need to establish proper ventilation near a window with a fume extractor positioned directly above your work area. Set up your workspace at elbow height with a 90-degree arm angle, placing tools within easy reach on your dominant side. Install LED lighting at 5000K-6500K color temperature to eliminate shadows, and keep a fire extinguisher and first aid kit nearby. Use a silicone workmat for stability and wear natural fiber clothing for protection. These foundational steps reveal advanced techniques that separate amateur hobbyists from skilled professionals.
Choosing the Right Location and Ventilation
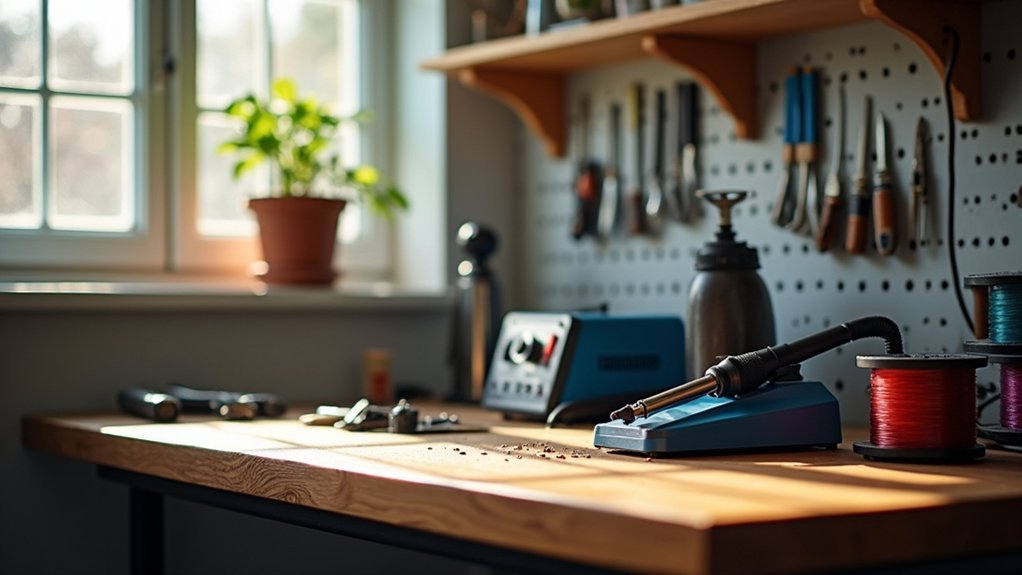
When setting up your soldering station, choosing the right location forms the foundation of both safety and efficiency. Select a well-ventilated area, ideally near a window, to facilitate fresh air circulation and effectively disperse harmful soldering fumes.
You’ll want to avoid confined spaces like walk-in closets, as they trap dangerous fumes and create safety hazards. Proper ventilation is vital for your health and workspace functionality. Use fans to draw fumes away from your work area, and consider adding ducting from hardware stores to enhance airflow if needed.
Position your station where you can easily access natural ventilation sources. Beyond ventilation, organize your tools on your dominant side for easy access, minimizing reaches over heated areas.
Verify your solder board is stable and heat-resistant to protect surfaces.
Essential Safety Equipment and Fire Prevention
You’ll need to establish fire safety measures before you start soldering, beginning with placing a fire extinguisher within arm’s reach of your workspace.
Keep a cup of water nearby as your first line of defense against small flare-ups that can occur during the soldering process.
Wear natural fiber clothing like cotton instead of synthetic materials, which can melt and cause severe burns if exposed to heat or sparks.
Fire Extinguisher Workspace Placement
Three critical factors determine ideal fire extinguisher placement in your soldering workspace: accessibility, visibility, and proper positioning relative to your workstation.
Position your fire extinguisher within easy reach on the side opposite your dominant hand. This placement prevents awkward reaching across hot equipment during emergencies. Mount it at eye level for maximum visibility, ensuring tools and materials don’t obstruct access.
| Placement Factor | Recommendation | Reason |
|---|---|---|
| Height | Eye level | Quick identification during crisis |
| Distance | Arm’s reach | Immediate accessibility |
| Side | Non-dominant hand | Avoids crossing workspace |
| Obstruction | Clear path | Unimpeded emergency access |
Choose Class B and C rated extinguishers for flammable liquids and electrical fires. Regularly inspect pressure levels and replace according to manufacturer guidelines. Educate household members about location and proper usage to maintain thorough safety awareness.
Natural Fiber Clothing
Smart fabric choices form your first line of defense against soldering burns and accidents.
You’ll want to wear natural fibers like cotton instead of synthetic materials. Cotton won’t melt and stick to your skin when exposed to high heat from your soldering iron, unlike synthetic fabrics that become dangerous hazards.
Natural fibers offer additional benefits beyond burn protection. They’re breathable, keeping you comfortable in heated work environments, and they generate less static electricity that could damage sensitive electronic components you’re handling.
Choose fitted clothing over loose garments that might accidentally contact hot surfaces or tools.
Keep your cup of water nearby for emergency fire suppression – natural fibers are inherently less flammable than synthetics, making them safer overall for your soldering workspace.
Emergency Water Supply
While your natural fiber clothing provides excellent protection, having an emergency water supply forms your second critical line of defense against soldering fires. Keep a cup of water within arm’s reach to quickly extinguish small fires from accidental burns or overheating components.
However, don’t rely solely on water for larger incidents. Position a fire extinguisher nearby that’s rated for electrical and chemical fires. You’ll need immediate access during emergencies, so place it strategically in your workspace.
Check its functionality regularly and follow manufacturer guidelines for maintenance or replacement. Consider adding a fire blanket to your emergency water supply setup. It’ll smother small flames safely without spreading fire.
Familiarize yourself with all equipment locations and operations beforehand—you won’t have time to learn during an actual emergency.
Selecting Your Primary Soldering Station
How do you choose the right soldering station that’ll serve as the backbone of your electronics workspace? You’ll want to prioritize quick heat-up times and stable temperature control to prevent cold solder joints. A digital display enhances your awareness of working temperatures, helping maintain ideal conditions throughout your projects.
| Feature | Benefit | Priority |
|---|---|---|
| Quick Heat-up | Faster project completion | High |
| Digital Display | Temperature monitoring | Medium |
| Multiple Tips | Project versatility | High |
Invest in a durable, reliable soldering station that includes various tips for different project needs. Don’t overlook safety features like automatic shut-off functions, which minimize overheating risks during prolonged use. Quality equipment pays dividends through longevity and consistent performance across diverse soldering tasks.
Installing a Fume Extractor System
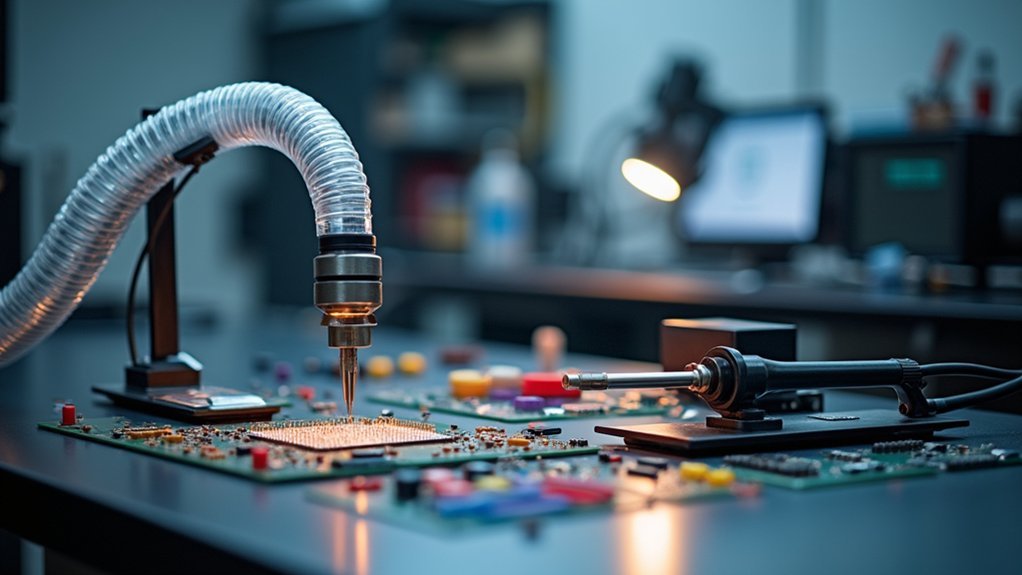
You’ll need to balance three critical factors when installing your fume extractor: fan power, noise levels, and airflow positioning.
Start by selecting a unit with sufficient CFM ratings to handle your workspace size, then plan its placement to maximize smoke capture without creating excessive noise disruption.
Consider how you’ll direct the airflow to pull fumes away from your breathing zone while maintaining a comfortable working environment.
Fan Power and Positioning
Anyone who’s spent time soldering knows that toxic fumes rise quickly from heated flux and solder, making proper ventilation vital for your health and comfort.
When setting up your fume extractor, position it directly above your work area to capitalize on smoke’s natural upward movement. This placement enhances extraction efficiency without interfering with your soldering process.
Fan power matters greatly for effective fume removal. Choose a fume extractor with strong airflow capabilities to guarantee all harmful vapors get captured and filtered.
However, powerful fans often generate considerable noise, so discuss operating schedules with family members to avoid disturbances during quiet hours.
Remember to regularly inspect and replace filters to maintain peak performance and keep your workspace air clean.
Noise Management Strategies
While powerful fume extractors provide excellent smoke removal, their noise levels can disrupt your workspace and household peace. You’ll need to balance extraction effectiveness with acceptable sound levels for your environment.
| Noise Level | Decibel Range | Management Strategy |
|---|---|---|
| Low | 30-45 dB | Position away from quiet areas |
| Medium | 46-60 dB | Use during designated work hours |
| High | 61+ dB | Communicate with family beforehand |
Before purchasing your fume extractor, check the manufacturer’s noise specifications. Consider your household’s tolerance levels and typical soldering schedule. If you’re working late hours or in shared spaces, invest in a quieter model even if it means slightly reduced suction power. You can also schedule intensive soldering sessions during times when noise won’t disturb others, ensuring both effective fume removal and family harmony.
Airflow Direction Setup
Once you’ve selected a fume extractor that meets your noise requirements, proper airflow direction becomes your next priority for effective smoke removal.
Position your fume extractor directly above your soldering area to capitalize on smoke’s natural upward flow. This airflow direction setup maximizes capture efficiency and keeps harmful particles away from your breathing zone.
If overhead placement isn’t possible, use ducting to redirect airflow from your fume extractor to the soldering location. The ducting maintains effective smoke removal while providing installation flexibility.
Ascertain your fume extractor’s fan generates strong suction to pull fumes through any ducting without losing effectiveness. This strategic airflow direction setup creates a controlled environment that consistently draws contaminants away from your workspace, maintaining clean air throughout your soldering sessions.
Setting Up Your Silicone Workmat
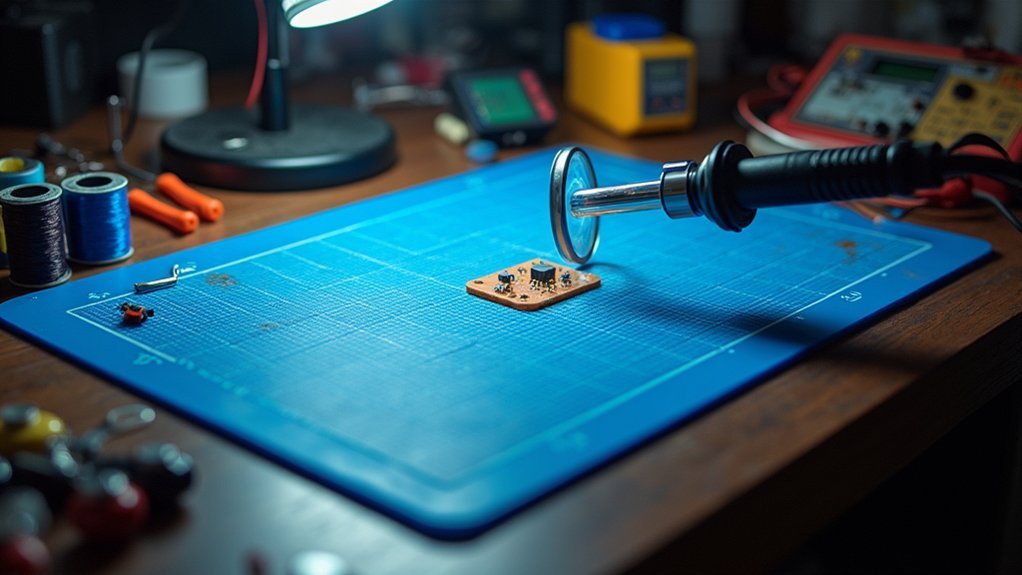
A quality silicone workmat transforms your soldering workspace from chaotic to organized, providing the stable foundation you need for precise electronics work.
Position your silicone workmat directly in front of your soldering iron within comfortable reach. The non-slip surface keeps components and tools from rolling away during critical moments.
Take advantage of the organized cutouts by placing frequently used items like tweezers, flux, and wire strippers in designated slots. This eliminates workspace clutter and guarantees everything’s within arm’s reach.
Align your components using the printed grids and measurements for accurate placement during assembly.
The heat-resistant surface protects your workbench from solder splashes and high temperatures.
When you’re finished, simply wipe down the mat with a damp cloth for easy maintenance.
Adding Hot Air Gun Capabilities
When you’re ready to tackle advanced soldering projects involving surface mount devices (SMDs), integrating a hot air gun into your station becomes essential. This tool provides precise heat application without direct contact, making delicate component removal and reflow soldering much more manageable.
Select the appropriate nozzle size and temperature setting to protect surrounding components. The ideal temperature range spans 250°C to 350°C, depending on your solder type and component sensitivity. Confirm your gun gets hot enough for effective soldering while avoiding damage.
Maintain a steady 5-10 cm distance from components to confirm even heat distribution and prevent overheating. This controlled approach enhances your station’s versatility, enabling you to handle advanced SMD techniques that traditional irons simply can’t accomplish effectively.
Positioning LED Lighting and Magnification
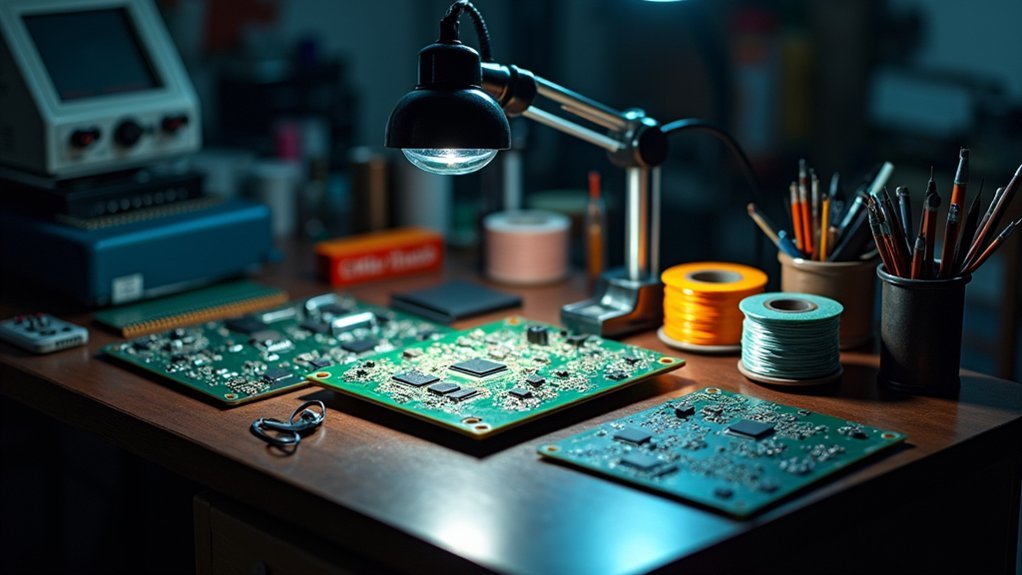
You’ll need to master three key aspects when setting up LED lighting and magnification for your soldering station.
First, you must position your light source to eliminate shadows while providing even illumination across your work area.
Then you’ll select the right magnification power and adjust the setup to prevent eye fatigue during extended soldering sessions.
Optimal Light Placement Strategies
How can proper lighting transform your soldering experience from frustrating guesswork to precise craftsmanship?
Position your LED lamp with magnifier directly above your work area to eliminate shadows and maximize visibility of fine details. You’ll want adjustable positioning on a flexible arm to accommodate different angles and project requirements.
Choose an LED with 5000K to 6500K color temperature—this daylight mimicking illumination helps you accurately distinguish colors and assess solder joint quality.
Keep your magnifier lens 4 to 6 inches from the work surface to avoid distortion while maintaining clear component visibility.
The key soldering tip: maintain an unobstructed workspace by keeping your lighting setup free from clutter, ensuring both optimal visibility and enhanced safety during delicate operations.
Magnification Power Selection
Since component sizes vary dramatically across electronics projects, selecting the right magnification power determines whether you’ll strain your eyes or work with crisp, comfortable clarity.
Choose magnification levels between 2x and 5x based on your project’s complexity. Basic through-hole components work well with 2x magnification, while surface-mount devices and intricate circuit board repairs require 3x to 5x power for ideal visibility.
Match your magnification choice to the precision demands of your soldering iron’s work. Higher magnification helps when working with fine-pitch components, but excessive zoom can narrow your field of view and create disorientation.
Start with moderate magnification and adjust upward only when necessary. Remember that higher magnification reduces your working distance, potentially interfering with soldering iron maneuverability.
Test different settings before beginning detailed work.
Reducing Eye Strain
Proper lighting placement works hand-in-hand with your magnification setup to create an eye-friendly workspace that prevents fatigue during extended soldering sessions.
Position your LED lamp directly above your work area to eliminate shadows and provide consistent illumination. Choose a lamp with adjustable brightness settings to prevent glare while maintaining clear visibility of small components.
Your magnifier should offer at least 2x magnification to reduce squinting when examining solder joints. Angle the light source to minimize reflections from shiny surfaces that can strain your eyes.
Don’t forget safety glasses – they’ll protect your vision while working under bright lighting. Take regular breaks every 30 minutes to rest your eyes and maintain comfort throughout your soldering projects.
Organizing Anti-Static Tools and Tweezers
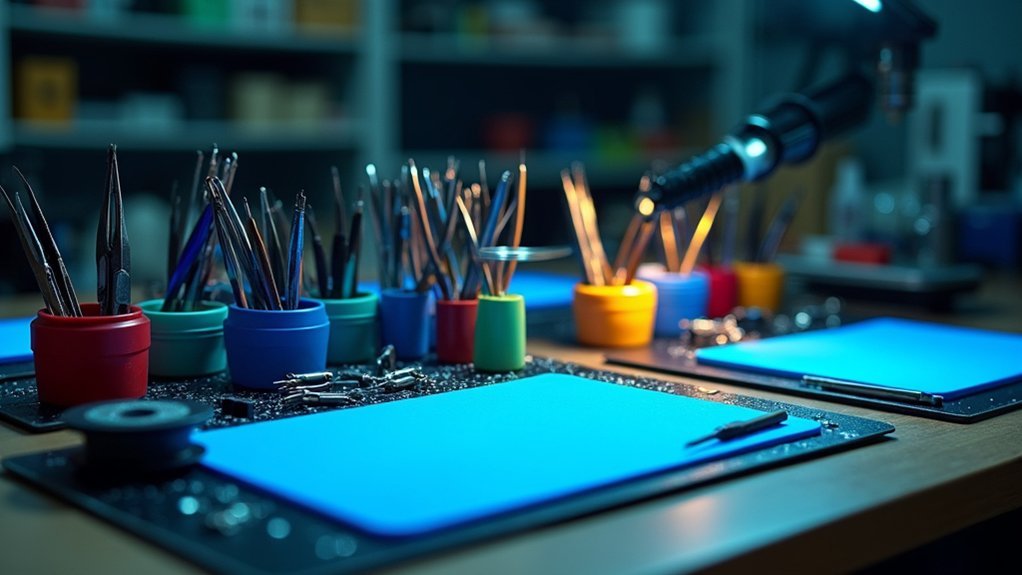
A well-organized collection of anti-static tools and tweezers forms the backbone of any efficient soldering station.
You’ll want to arrange these essential tools on a silicone workmat with designated cutouts to prevent clutter and guarantee quick access during soldering tasks.
Choose anti-static tweezers with non-magnetic designs to handle delicate components safely without risking static damage.
Non-magnetic anti-static tweezers protect sensitive electronics from static discharge while ensuring precise component handling during delicate soldering operations.
Make certain your workspace is properly grounded to avoid static buildup that can harm sensitive electronic parts.
You should select tweezers with varied tip shapes—pointed, flat, and curved—to accommodate different soldering tasks and component types effectively.
Don’t forget to regularly inspect and clean your anti-static tools to maintain their effectiveness and prolong their lifespan, guaranteeing they remain reliable for intricate projects.
Selecting Proper Soldering Tips
With your anti-static tools properly arranged, you’ll need to focus on choosing the right soldering tips for your workstation. Your soldering iron’s effectiveness depends heavily on selecting appropriate tip shapes and sizes.
Choose fine tips (1-2mm) for precision work on small components, while larger tips (3mm+) handle bigger joints with faster heat transfer. Chisel tips work best for drag soldering, conical tips excel at point-to-point connections, and fine tips tackle detailed circuit work.
Invest in high-quality copper tips with iron coating for maximum heat conduction and durability. Consider a soldering station with interchangeable tips—this lets you switch between different tasks without multiple irons.
Remember to maintain your tips through regular cleaning and tinning to extend their lifespan and preserve performance.
Workspace Ergonomics and Personal Protection
Once you’ve selected your soldering tips, establishing an ergonomic workspace becomes essential for maintaining comfort and safety during extended soldering sessions.
Proper workspace ergonomics prevents fatigue and reduces injury risk while improving your soldering precision.
Smart ergonomic practices minimize strain and maximize precision, transforming your soldering workspace into a hub for consistently professional results.
Configure your setup with these key elements:
- Adjust chair height so elbows maintain a 90-degree angle with straight wrists
- Position your soldering station at comfortable height to avoid hunching over
- Install a magnifying lamp to enhance visibility and reduce eye strain
- Wear properly fitted safety glasses for protection against solder splashes and fumes
- Organize tools within easy reach on your dominant side to minimize stretching
These workspace ergonomics adjustments create a safer, more comfortable environment that supports better soldering results and protects your long-term health during demanding projects.
Frequently Asked Questions
What Makes a Good Soldering Station?
You’ll want quick heat-up times, stable temperature control, and a digital display for monitoring. Look for durable construction, interchangeable tips for versatility, and additional safety features like integrated fume extractors.
What Is the Secret to Good Soldering?
You’ll master soldering by maintaining steady hands, using proper temperature control, and ensuring clean surfaces. Don’t rush—let the solder flow naturally, and always tin your iron tip for ideal heat transfer.
What Temperature Should I Set My Soldering Station?
You should set your temperature between 350°C-400°C for standard components. Use 250°C-300°C for delicate surface mount devices. Lead-free solder needs higher temps than leaded solder, so adjust accordingly.
What Is the Best Wattage for a Soldering Station?
You’ll want a 40-60 watt soldering station for most electronics projects. This range provides quick heat-up times and sufficient power without overheating delicate components. Higher wattages work for heavy-duty tasks.
In Summary
You’ve now built a professional-grade soldering station that’ll serve you for years. Your workspace combines safety, efficiency, and comfort – three pillars that separate amateur setups from pro-level stations. Remember, you’re only as good as your tools and environment allow. Take time to maintain your equipment, keep your workspace organized, and don’t rush your projects. With this setup, you’ll tackle any soldering challenge with confidence and precision.


Leave a Reply